Common Postman Errors And How To Resolve Them
When testing API actions, the most common errors are caused by:
- incorrectly inputting information such as using the wrong URL for the domain
- not authorizing properly using the API Key and Auth Token
- not assigning the necessary TrackVia resources to the API user
The sections below identify the most common errors you may encounter while using Postman for testing and the steps to take to resolve them.
Common Errors While Using Postman
The most common issues people encounter while using Postman are very similar to those described above when using Swagger. One difference between using Postman and Swagger is that with Postman you can add the domain, API Key, and Auth Token credentials as variables. This allows for better security as the variable does not show the access credentials, and once the credentials are saved as variables, you do not have to re-enter them each time you want to authenticate.
1. Incorrect Domain
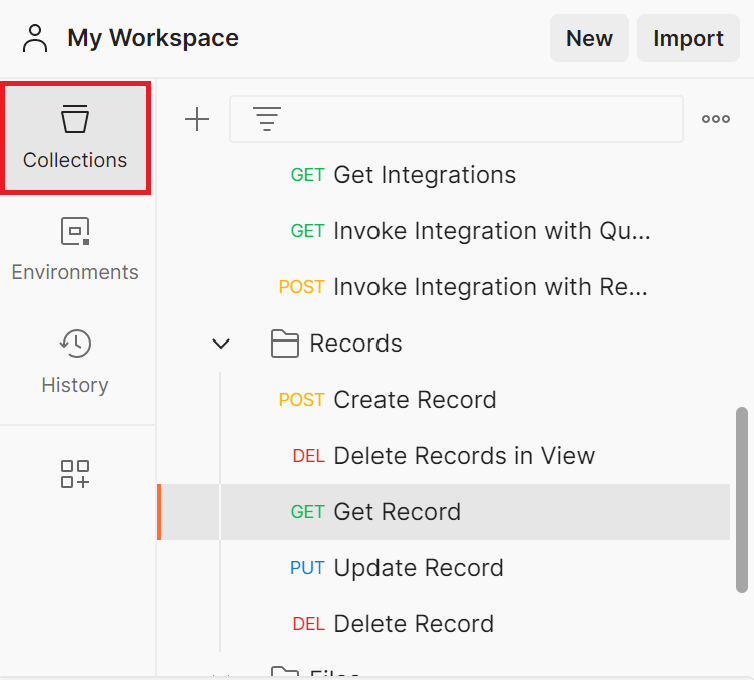
After you've imported the TrackVia Postman collection to Postman, you can click on "Collections" on the left side of the screen to choose an API call.
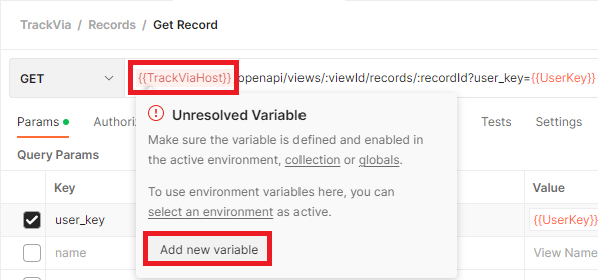
After selecting the action, you can add the domain URL as the {{TrackViaHost}} variable to the right of the API call dropdown menu (see below). First, click on {TrackViaHost}}, and in the message that opens, click the "Add new variable" button to enter your URL.
Just as with Swagger, go.trackvia.com should work for most cases if your account is on the standard PRODUCTION environment. If your account is on the GOV or HIPAA environments, you will need to enter the corresponding URL for your environment (e.g. https://hipaa.trackvia.com (opens in a new tab)). If your account uses a custom subdomain, you can use the default go.trackvia.com, or enter your custom subdomain here, but note that it will not work if the custom subdomain is not entered exactly as it appears in your account.
If you try to send the API call without adding the correct URL as the {{TrackViaHost}} variable, or you've entered the incorrect URL, you will receive a "Could not send request" error message as seen below.
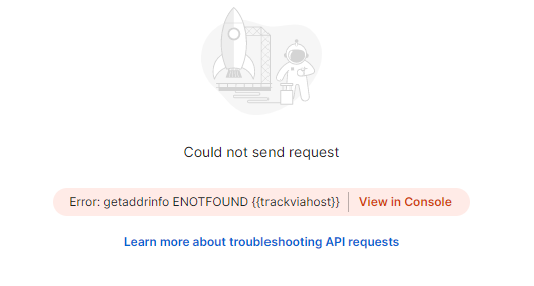
To resolve this, make sure you are using the correct URL for your account's environment, and it's highly recommended to add it as the {{TrackViaHost}} variable.
2. Incorrectly Entering Authorization Information
Just as you would with Swagger, you should create an API user, the API Key, and a valid Auth Token before you begin working in Postman. You can read more about how to set these up in this Help Center article (opens in a new tab).
As mentioned above, it is recommended that you add your URL, API Key, and Auth Token as variables. Once you've added these variables, you will not need to re-enter their details and re-authenticate each time you test something in Postman.
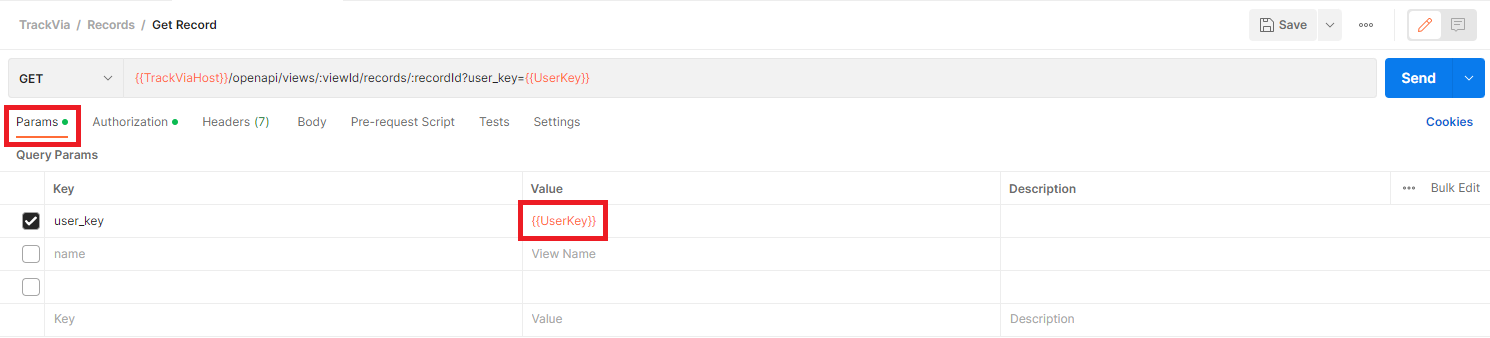
After you've selected an API call from the TrackVia collection, click on the "Params" tab, then click on the {{UserKey}} variable (see screenshot below) to add your API Key information as the variable in the same way as described above for adding the URL as the {{TrackViaHost}} variable.
To enter your Auth Token information, click on the "Authorization" tab, and in the "Type" dropdown, select "Bearer Token". Then, click on the {{AccessToken}} variable to add your auth token details as a variable (see below).

3. API User Does Not Have Access to Necessary TrackVia Resources
When working with Postman, error messages will appear in the “Body” section below where you entered the information such as your View ID for a "Get Record" call.
Keep in mind that whichever Auth Token you used for this call is connected to an API User, and you will only be able to access resources (such as Views) that have been assigned to the API User's role. If the API User is set as a Super Admin, they will have access to all resources in the account. If you only want to access specific resources via the API, you will need to create a Role within each application in your account, assign the API User to the role, and assign whichever resources to that role that you want to access.
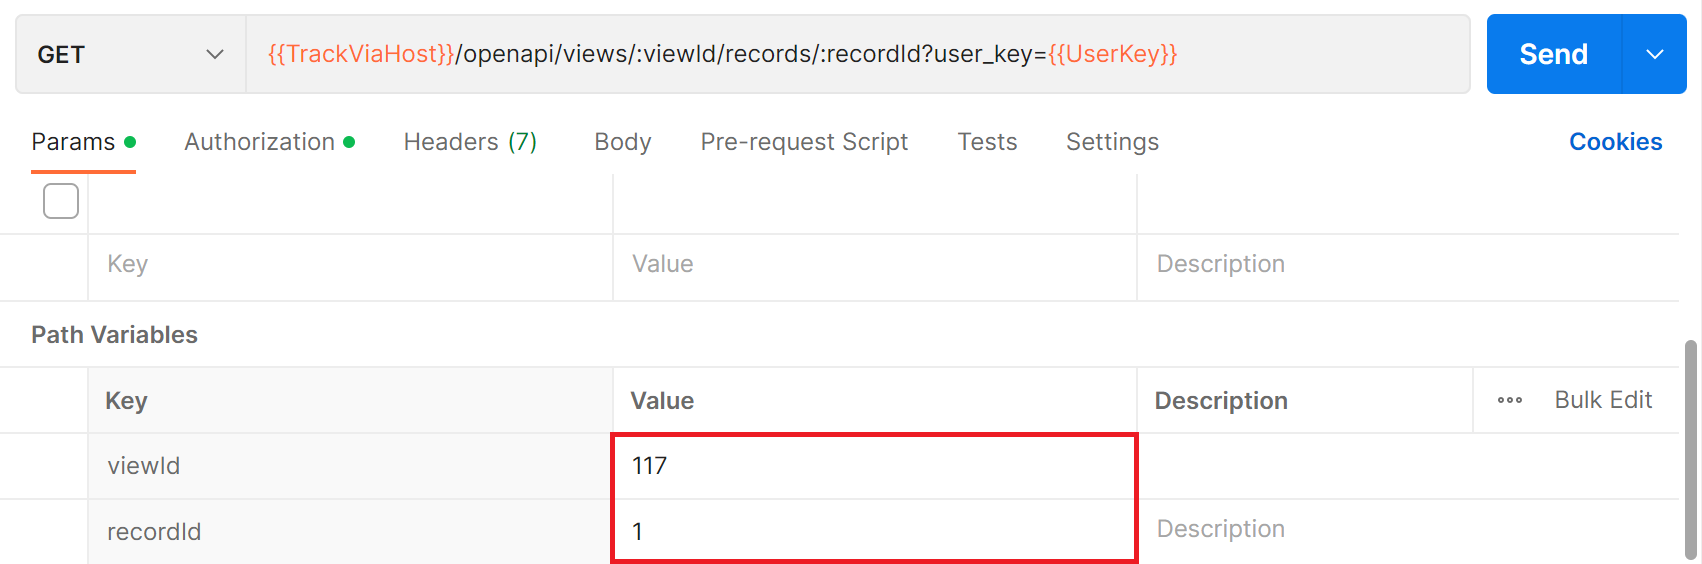
For example, if you are using the "Get Record" call, you would enter a view ID and record ID in the corresponding "Value" fields as shown below.
After clicking the blue “Send” button, if you see a 401 error message in the "Body" section saying “DENIED!!! - Record: XXXX either does not exist or you do not have access to it.” (See screenshot below)
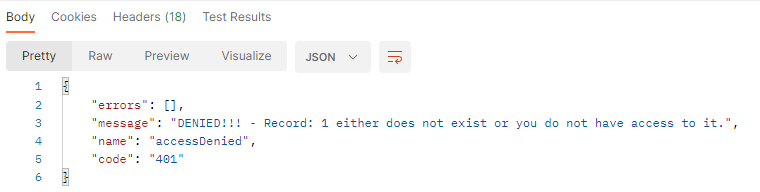
That means that either: a) you incorrectly entered the Record ID and there are no records with that ID in the View you chose, or b) the API User associated with the Auth Token you used does not have the View in question assigned to their role, and so it cannot be accessed. To resolve this, make sure that the view you are referencing is assigned to whichever role the API User is assigned to.
4. Other Systems Require Authentication Details to Be Entered Differently
Note that if you are integrating with systems besides TrackVia, they may require you to enter your API Key and Auth Token details in different fields than we described above in section 2. For example, we entered our API Key information under the "Params" tab in the "Value" field next to "user_Key". If you are integrating with another system, they may require you to enter your API Key under the "Headers" tab instead of the "Params" tab.
And just as mentioned in the Swagger section above, keep in mind that other systems may have different definitions for what each API call does.
If you are integrating with other systems, be sure to refer to their API documentation as they may not have the same requirements as TrackVia, or use the API calls in the same way that TrackVia does.